To ensure you hit the ground running, here is a small account checklist to help you set up.
In your personal profile there are two important things to add the first time. These are your profile picture and your signature.
Clients like to see who they are doing business with. These two options make sure you make it personal and clear to the customer receiving our quotes who you are.
Go to Settings > Profile
Upload your profile picture
Add your signature

Your logo will most likely already be uploaded when you start using SafariOffice the first time. But if you rather use a different logo, or you have a higher quality one available, you can always change it.
Change your logo here: Settings > Marketing > Logo
When you set your default in and exclusions right in the settings this will save a lot of time when you create new templates and new quotes. They will be used in all quotes and templates. After making a change the system will ask you if you want to update all templates and quotes (that haven't been sent yet). With the push of the button everything is updated. You can still make changes to individual quotes and templates if you wish.
Just start typing in the area you want to add in- or exclusions, the auto-suggest will give options but you can also add your own entries just by typing in the one you want and clicking 'Create a new entry named ....'. (This trick works in many places within SafariOffice!)
Simply click the little cross on the label to remove one again.
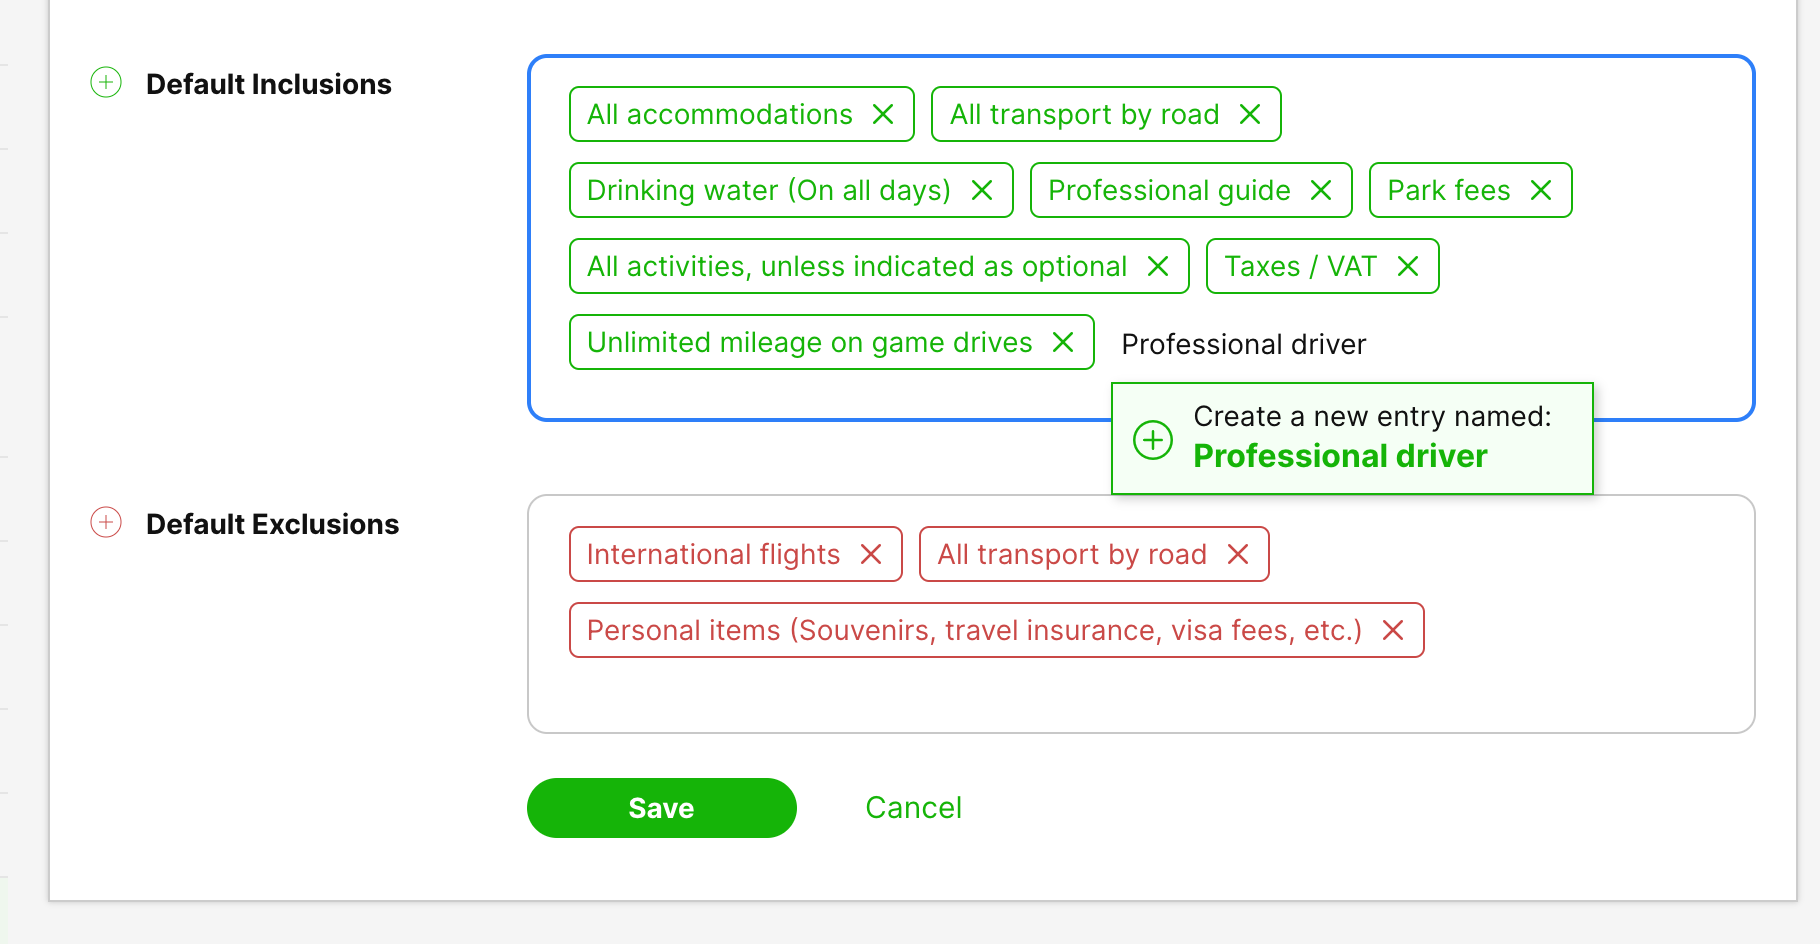
Set your In- and Exclusions here: Settings > Quote Settings > In-&Exclusions
Here is a video on how to go about it.
You have three options for creating your Terms and Conditions.
Either;
Upload a PDF
Copy and Paste text (and SafariOffice will create a PDF document)
Use a link (url) to your online Terms and Conditions.
You can have more then one Terms and Conditions document when you need to.
You can also set this document to always be included with the quote, so it can never be forgotten. Simply check 'Always add to quote'.
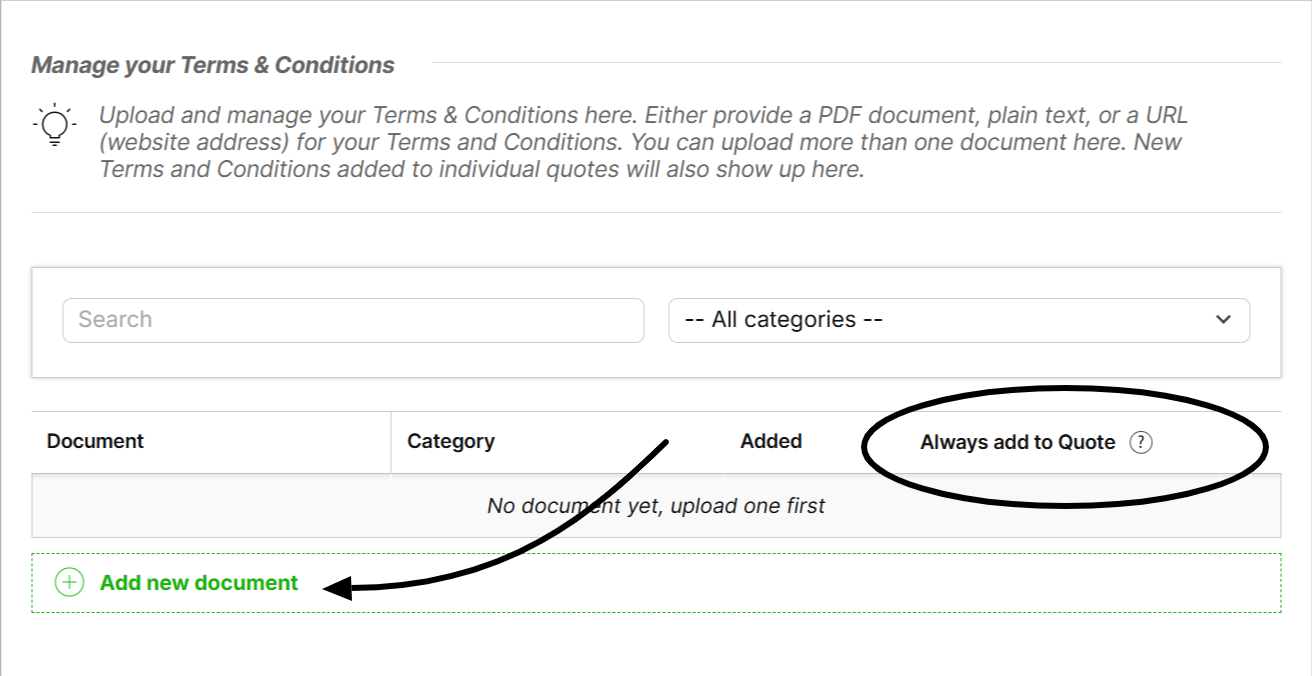
Manage your Terms & Conditions here: Settings >Quote Settings > Terms & Conditions
Don't forget to set your Payment Terms here in the tab Payment Terms.
Clients like to understand the payment schedule, like how much they might need to pay at booking confirmation and when they need to pay the other installments.
Do it here; Settings > Quote Settings > Terms & Conditions > Payment Terms
How to Add a New User to Your Account.
About adding your colleagues to SafariOffice, user roles and permissions
