It's important to know that before you can continue to create a quote you need a request first. Once you've signed into your account, you'll see the new requests within the request inbox.
These may stem from Safari bookings and will have automatically come through to your Safari office account with all of the details filled out.
How to Connect SafariOffice to SafariBookings
Learn how to connect SafariOffice and SafariBookings to sync requests and tours.
Another way to get requests into SafariOffice automatically is through the use of the Share Tours Add-on. See more about this feature in the article below.
How to Use the Share Tour Add-on
Here is a step-by-step detail to set up your share tours.
However, for any other source of request. Be it, email, social media, or even word of mouth, you'll need to add these requests manually. To do so, click on the button, add new request. In the left side menu.
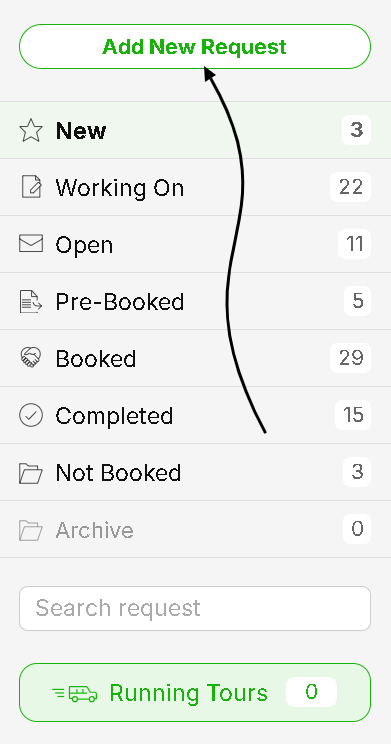
After clicking ‘Add new Request’
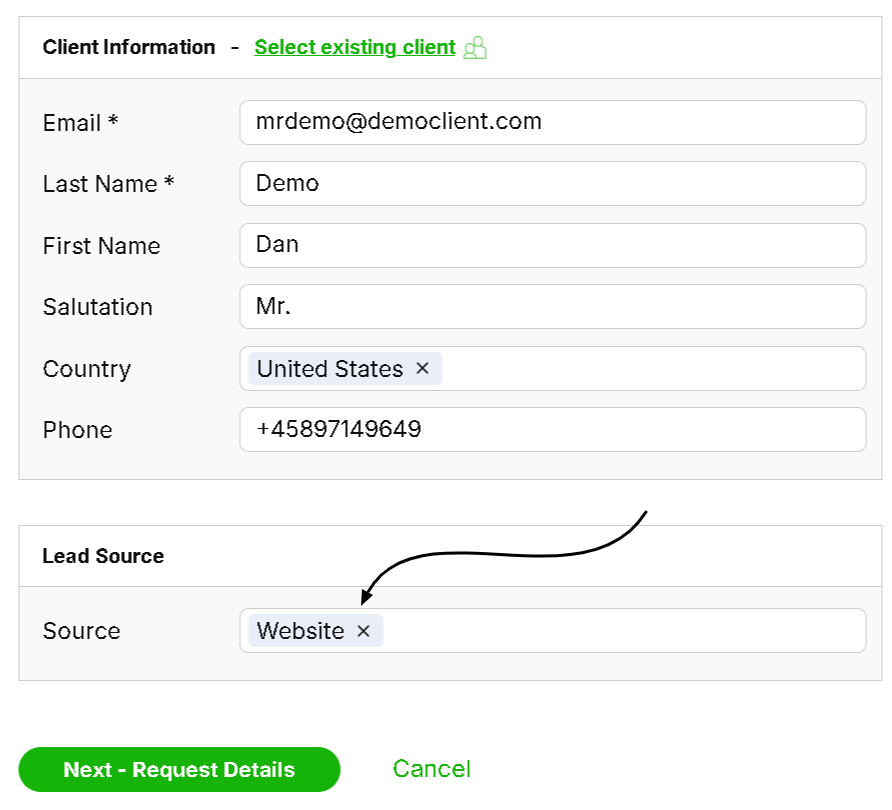
You can now fill in all of the client details in the ‘client information’ form fields.

It is also really important to fill in the ‘Lead Source’ field. This is essentially the way you received the request. Was it through your email campaign or possibly via your website? This way you can track which advertising strategy is the most successful.

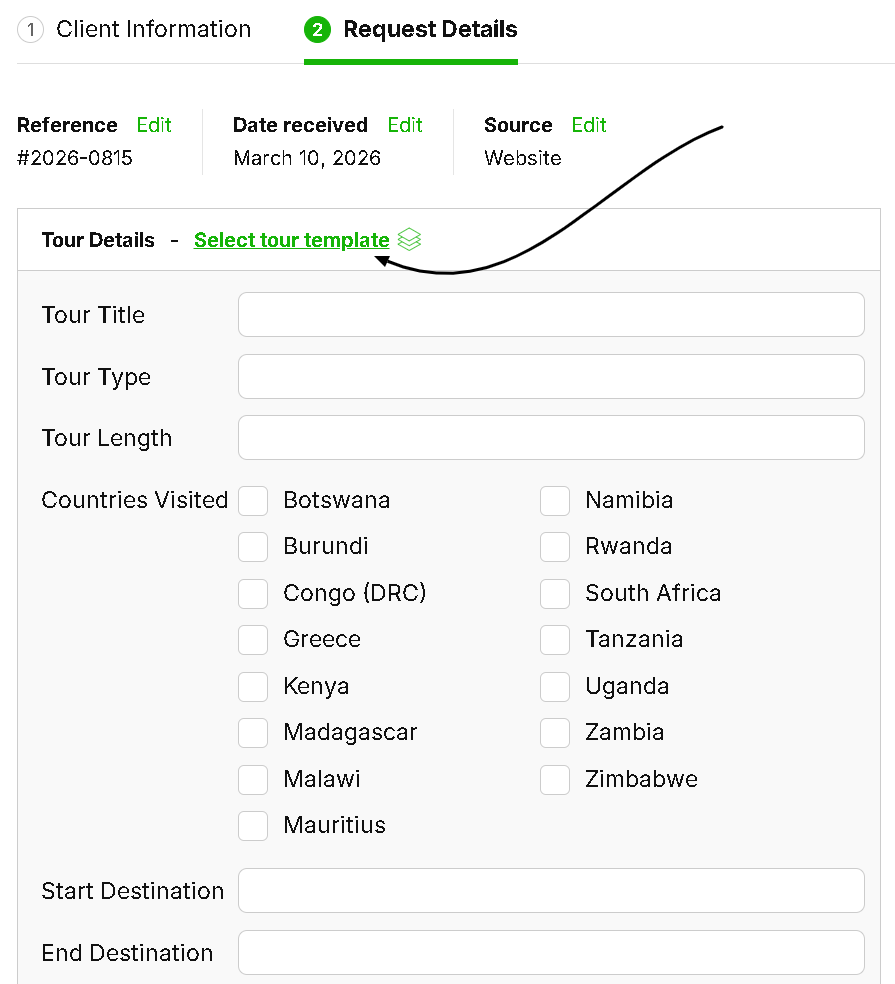
Now in step two, under tour details have two options.
You can either fill in the information manually
Or make use of a template.
After this you can fill in a fixed date or flexible period (if your client hasn’t selected a fixed date of travel).
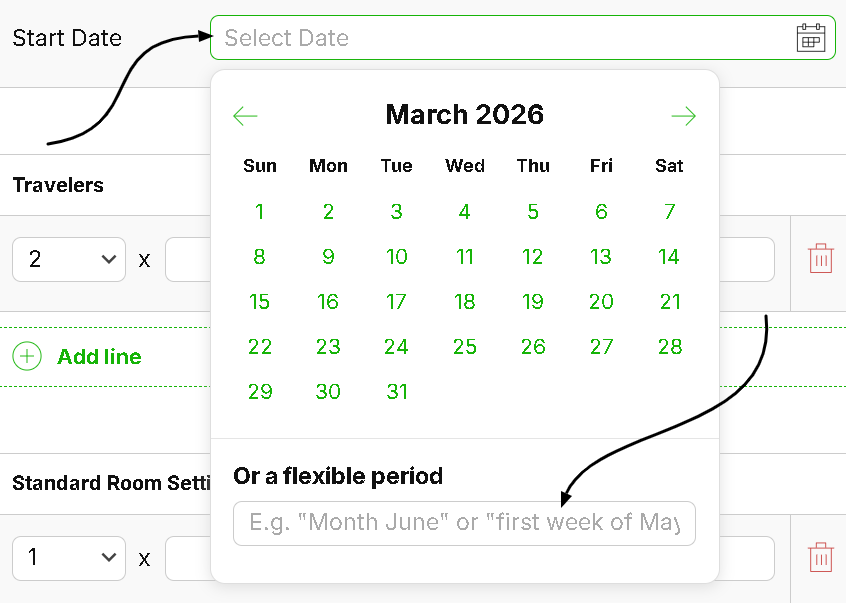
Thereafter you can fill in the travelers. Specify them by age group especially if you charge different rates for adults/children/pensioners etc.
In the standard room settings, you can fill in the room type which will be applied to every day of the tour. You can change this on a per day basis in the next step
In the final section ‘Notes’, put down any questions or remarks from the client that will need to be addressed later.
The request is now complete.
Click below to navigate to the next part of the onboarding series :
#4 Quote Building Overview
A brief overview of how to build a quote
