An overview of the bigger picture can help to demonstrate how easy it is to use SafariOffice. That is why it is important to have a quick look at this video and/or article before diving into the individual steps in more depth.
To begin the process you first need to create a request , please refer to the previous video in the series on how to do just that.
This overview also makes use of a template. A template does most of the heavy lifting for us in the quote creation process if it has been completed correctly.
How to Create a Tour Template
Learn about how to create a tour template and the difference between a tour template and a quote.
To begin the process, click on the green button in the top right, ‘create quote’. The quote then opens in a new tab.

Immediately you will be taken to step one ‘day by day’ here. All the itinerary details are filled in already because of the use of a template.
The next step in the process is the pricing section. This is where you will fill in the pricing for the tour as well as for alternate accommodations and optional extras.
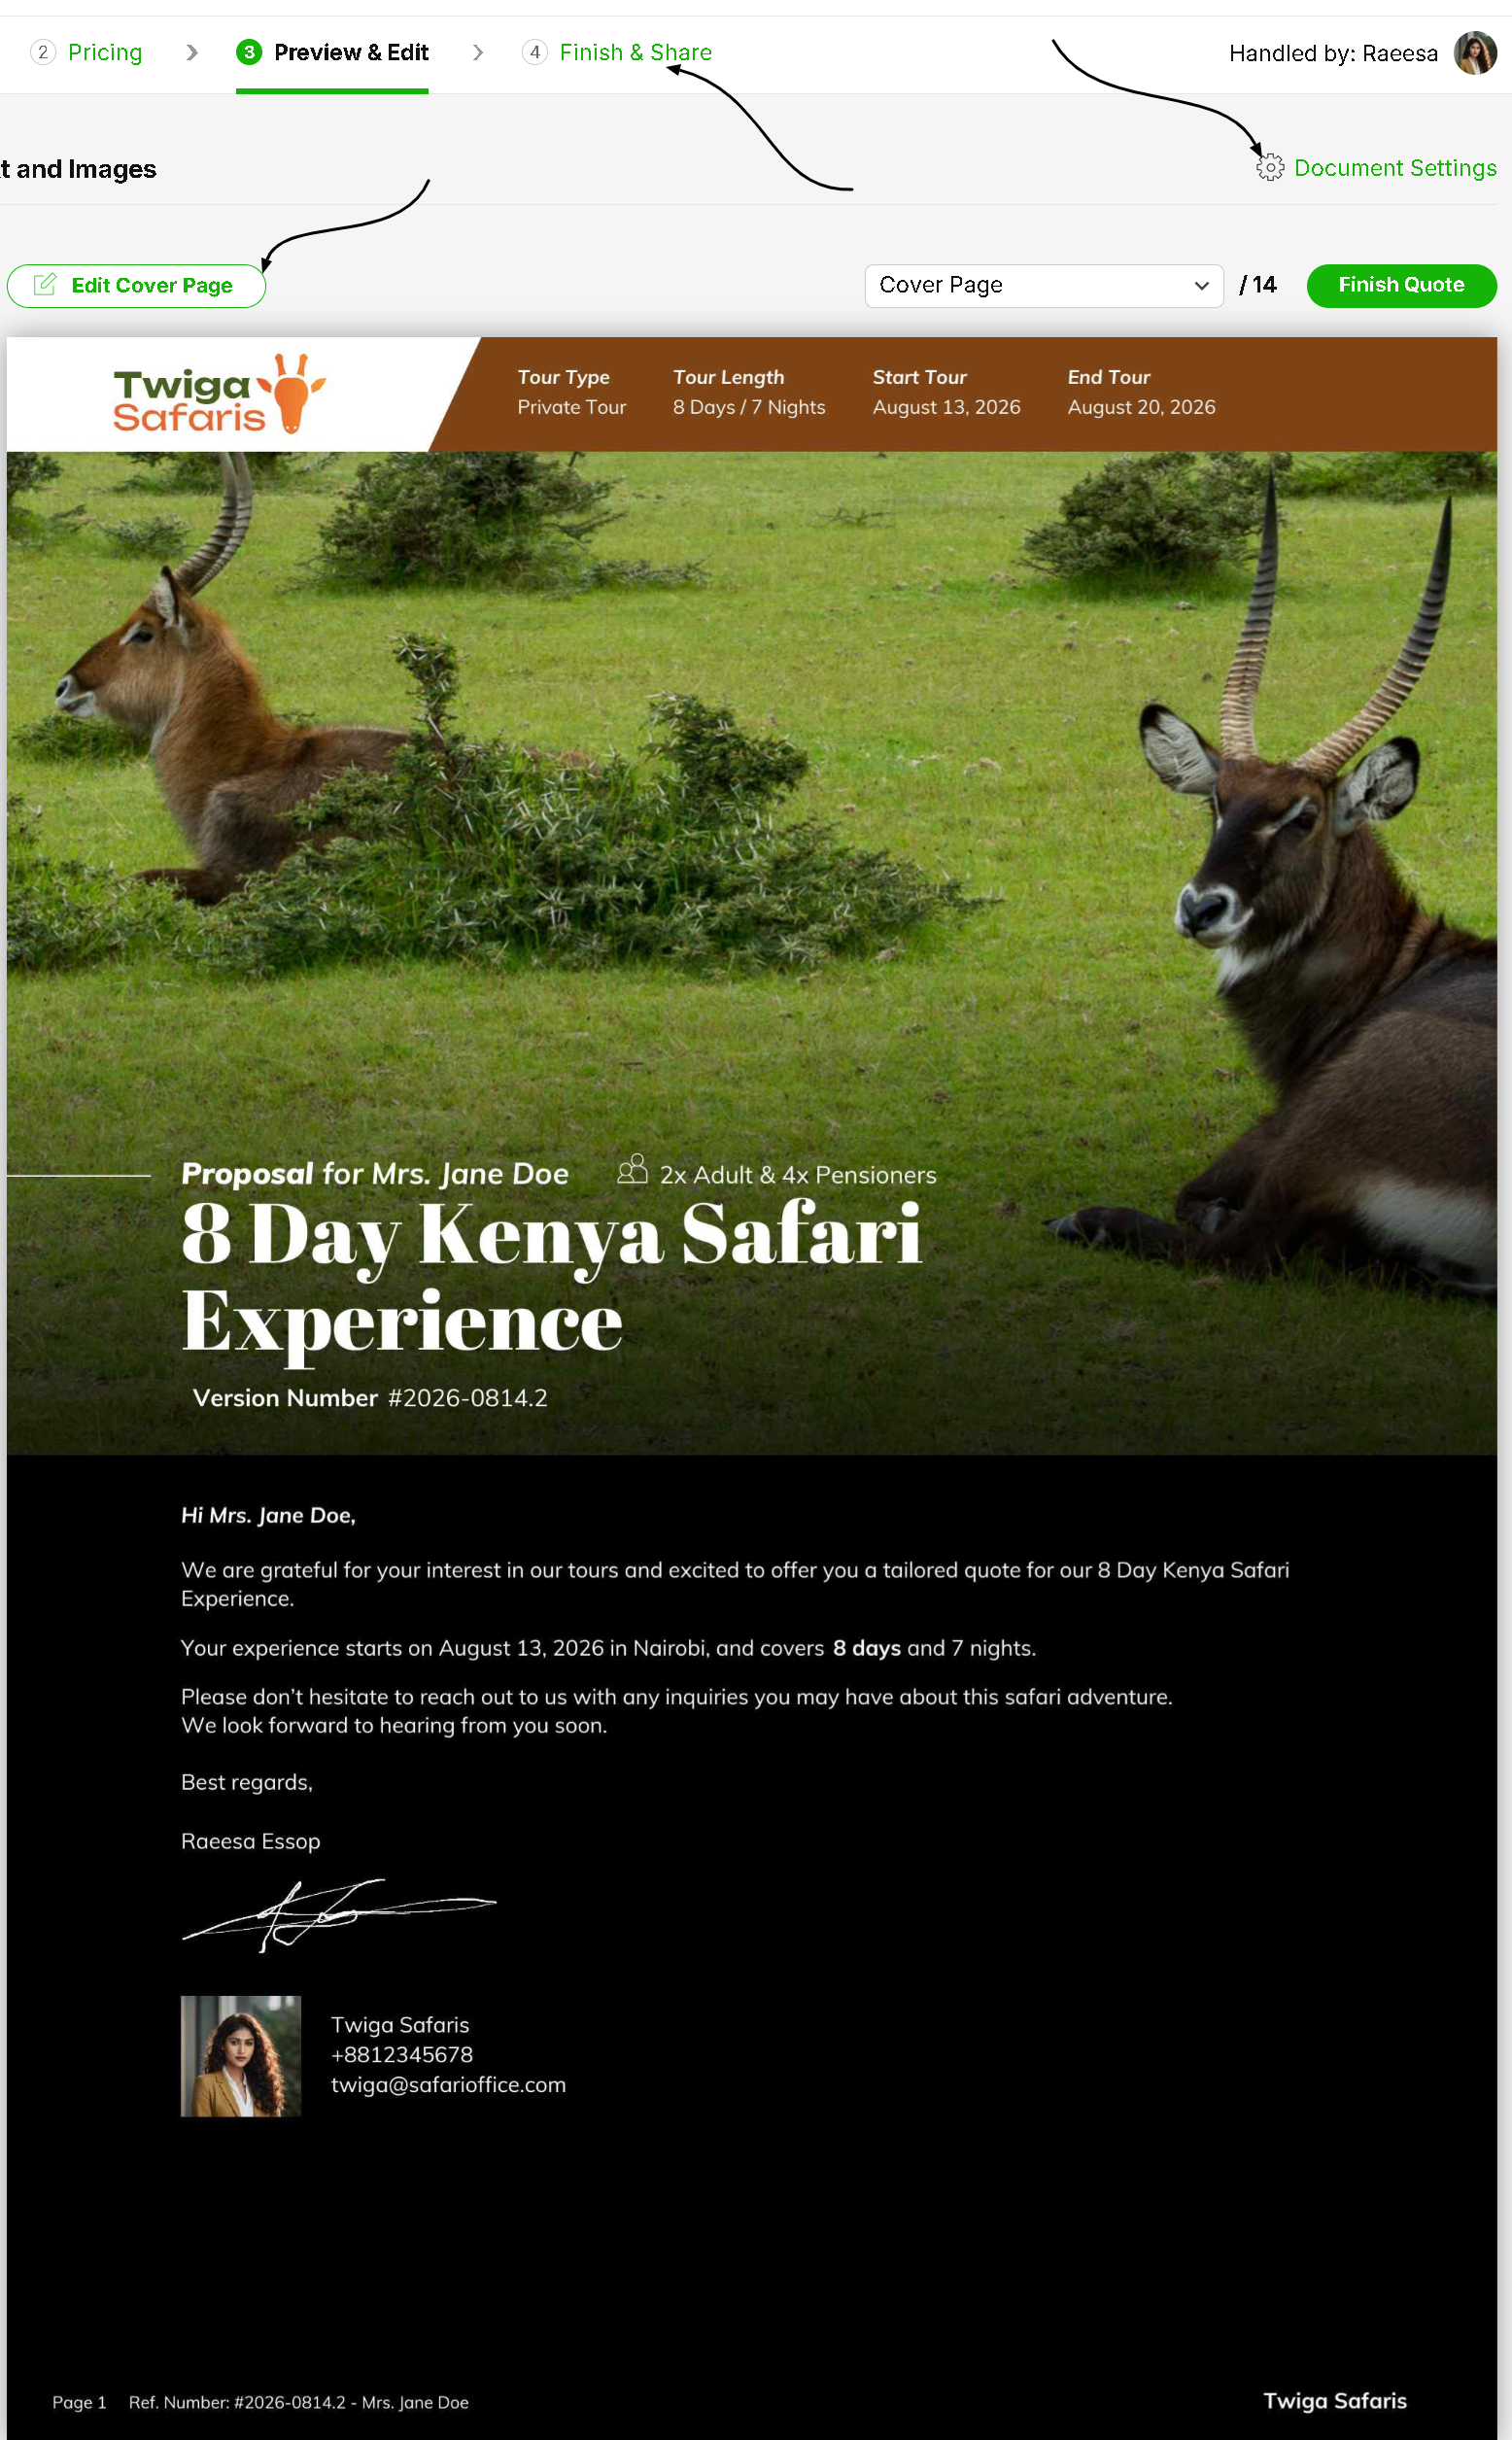
In step three, you can preview and edit the pdf document as well as the digital itinerary in one place. Here you can change or upload images, edit text items, and essentially personalize this document for the traveler it is being sent to.
How to Add and Manage images and Video
Learn how you can add and manage your images and videos in your content library.
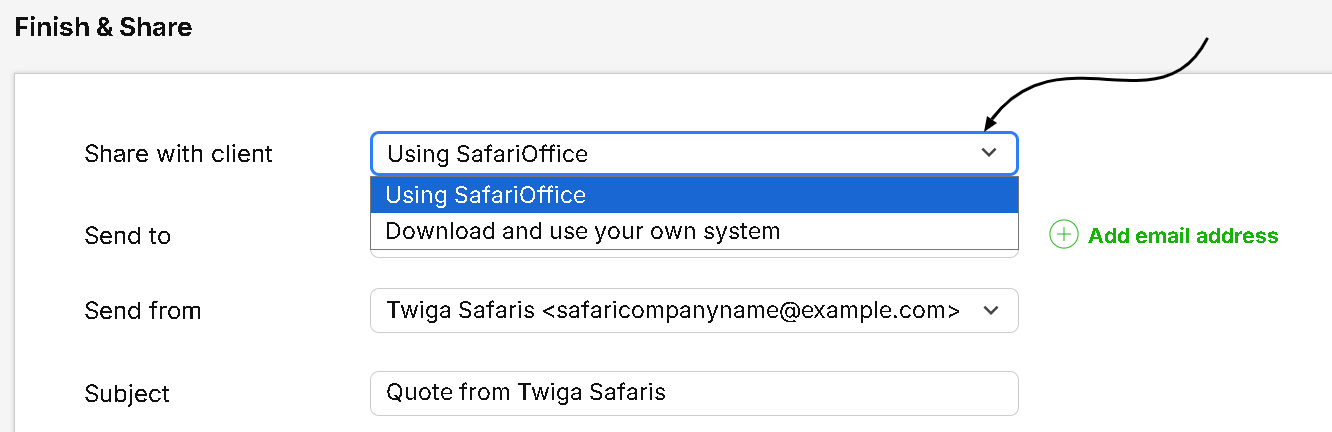
Lastly, in step four, ‘finish and share’. You can send this document to the client using SafariOffice or your own separate IT system.