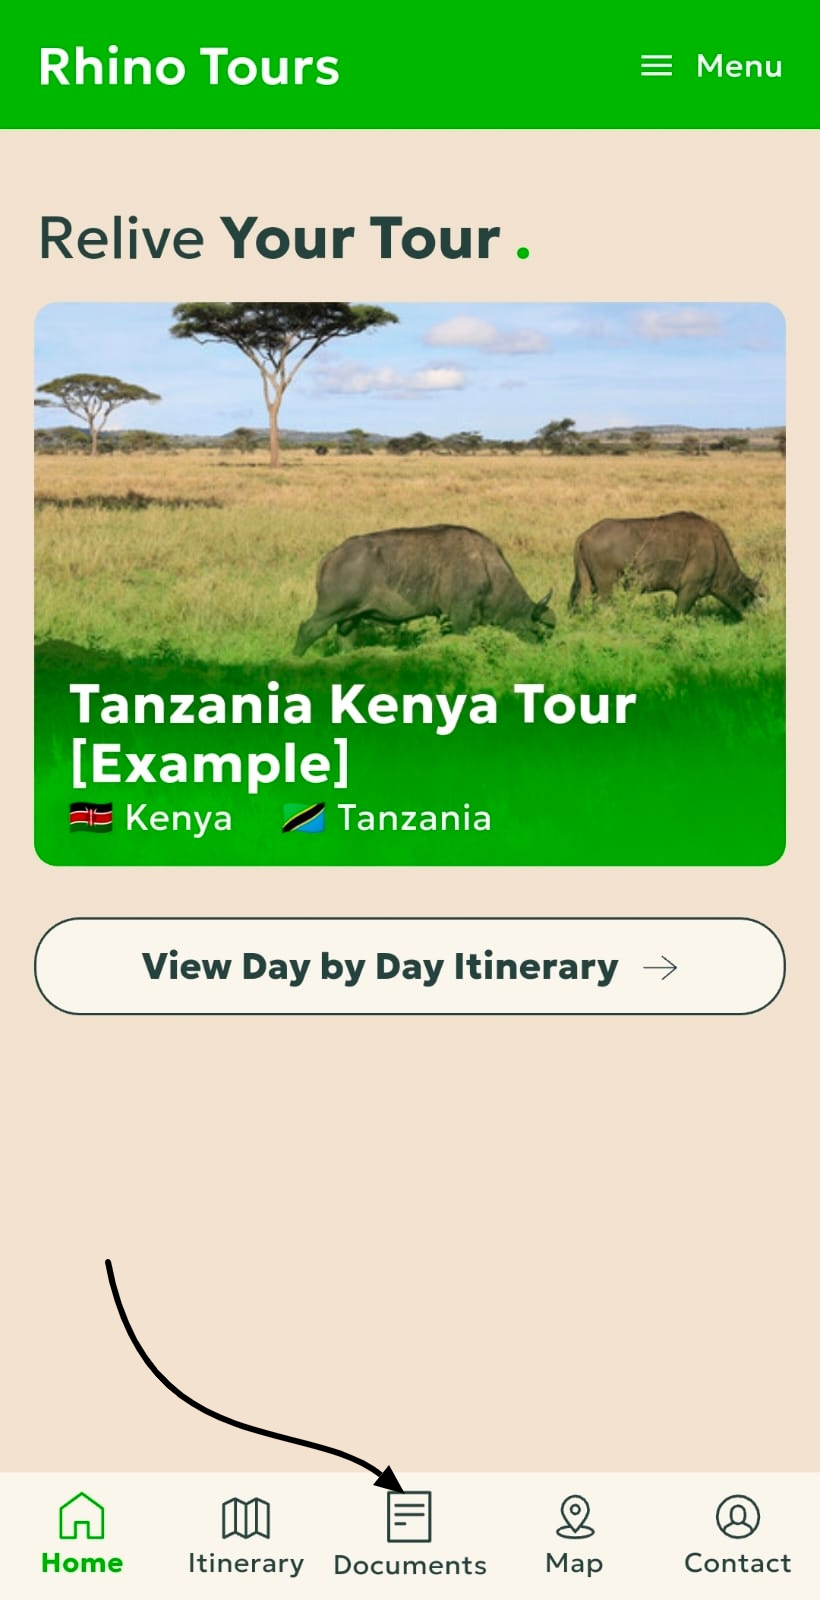
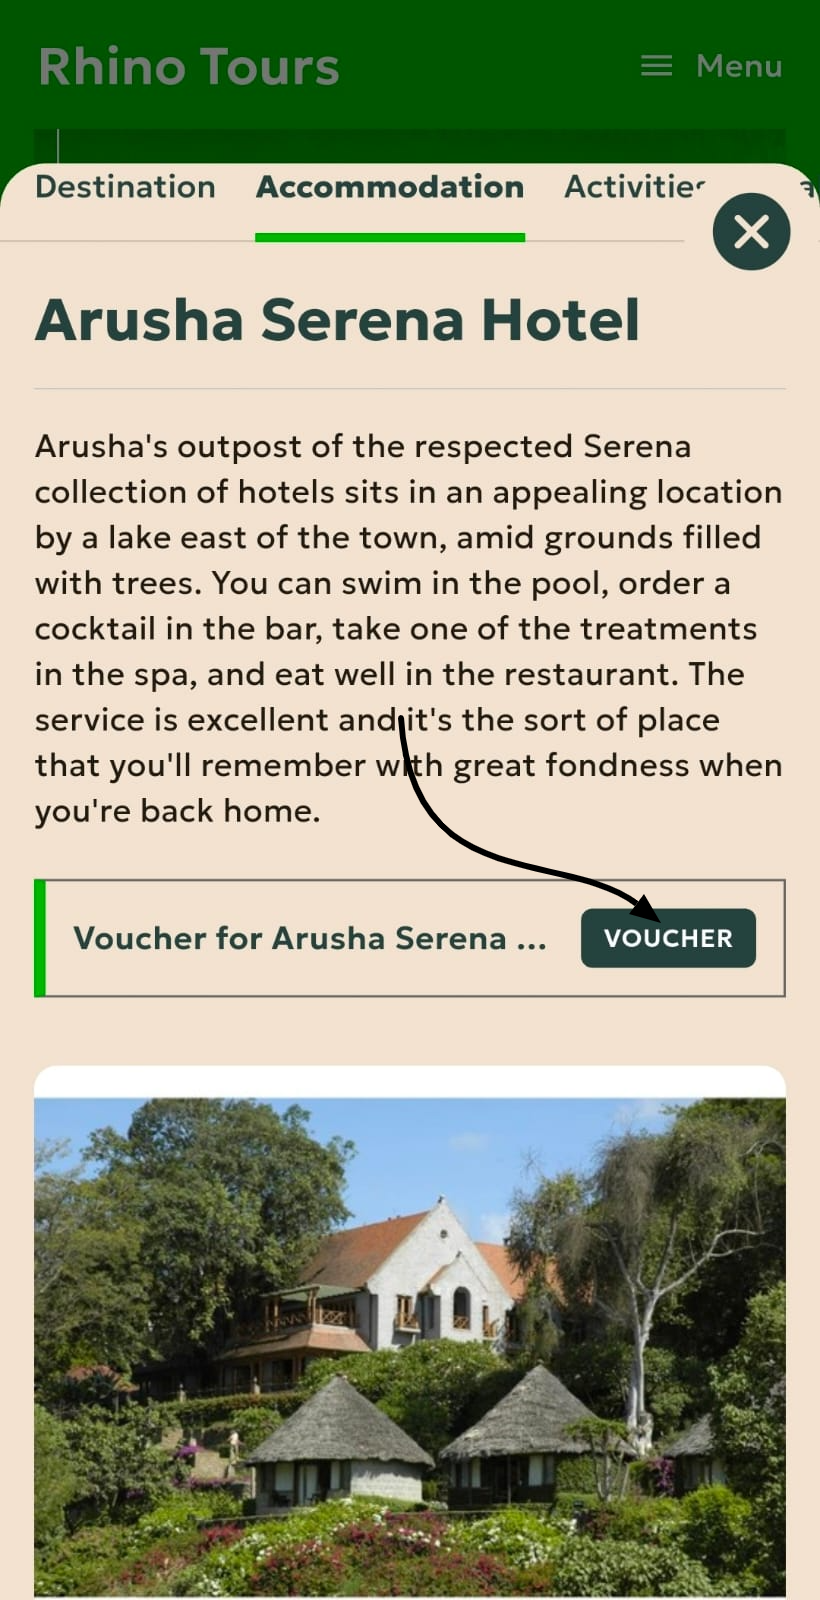
Give your clients the right travel information at the right time to ensure a smooth trip. This builds trust and peace of mind, saves you time, and delivers excellent service that leads to happy customers and positive reviews.
Documents are general files, web links, or the original booked quote that provide extra context or information for the trip. You can add frequently asked questions, contact details, or other essential resources.
Vouchers are specific proof-of-booking documents. You can upload existing supplier tickets or use SafariOffice to generate customized vouchers for accommodations, activities, or the entire tour.
Go to the booked quote and click Manage SafariBuddy.
On your SafariBuddy Manager, click the Documents & Vouchers tab.

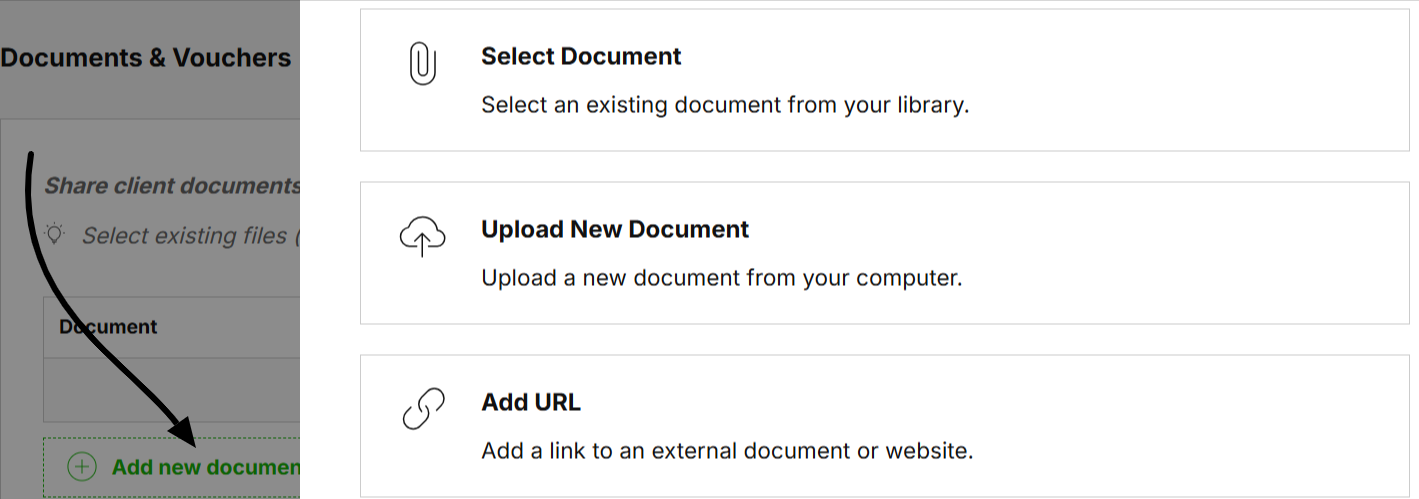
Click Add new document.
You can either select an existing file you uploaded before, upload a new document, or enter a URL.
After adding the document, choose the visibility.
You get to decide which travelers can view the document, important for some type of documents that are personalised or only relevant to part of the traveling group.
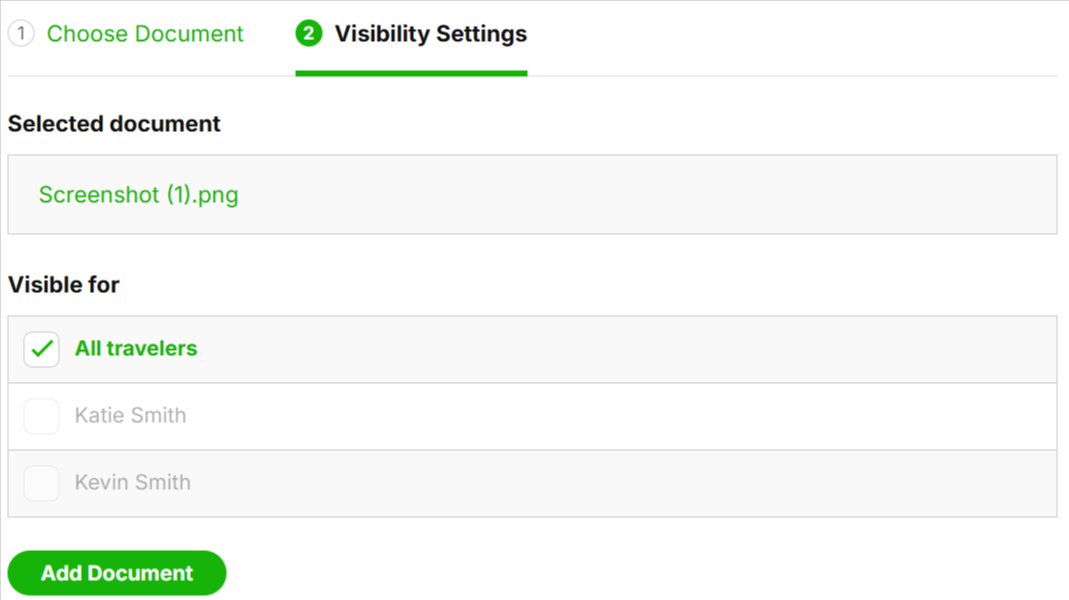
Click Add document.

You can use SafariOffice to easily create clean, informative vouchers using information from the itinerary you've already created. It only takes seconds. But you can also upload vouchers provided by suppliers, for example by a balloon company or a lodge. If your clients want vouchers this is the tool you need.
On the Documents and Vouchers tab, click Add New Voucher.
Choose to either Create a new voucher or Upload a new voucher.
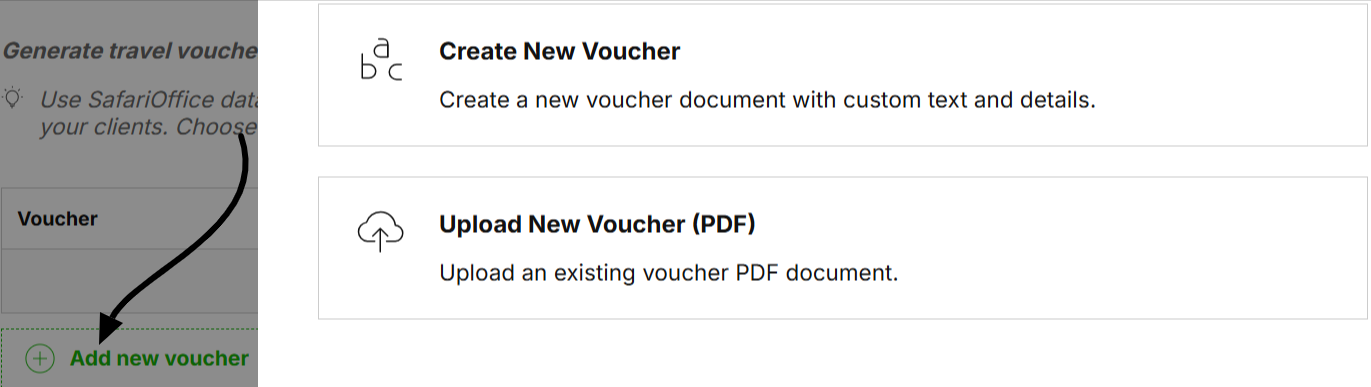
Select Create a new voucher.
Choose the voucher type. Whether it’s a booking confirmation, activity voucher, or any other type of voucher.
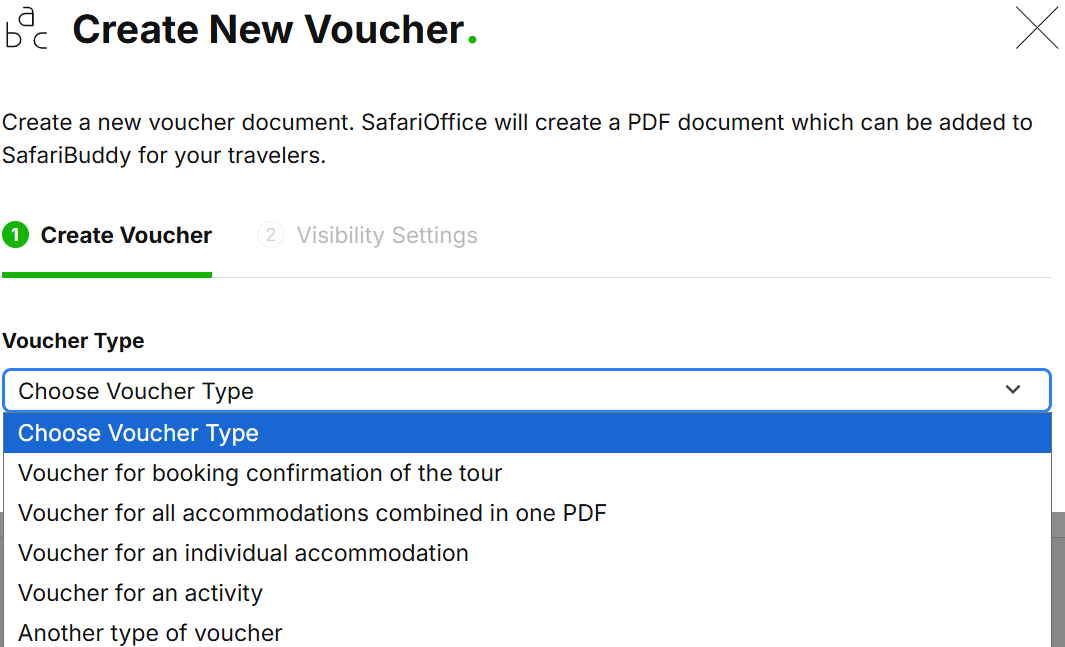
Enter any required reservation/booking numbers or custom notes in the free text fields as you see fit.
Click Save and Set the Visibility Settings.
Select Upload a new voucher.
Upload the document provided by your supplier.
Set the visibility for individual travelers or the whole group.
SafariOffice automatically fills generated vouchers with your logo, booking dates, and relevant itinerary details.

Clients will access their vouchers directly in the SafariBuddy app on their mobile devices.
Once they open the tour on SafariBuddy, all the documents and travel vouchers can be found in the Documents section of the app.