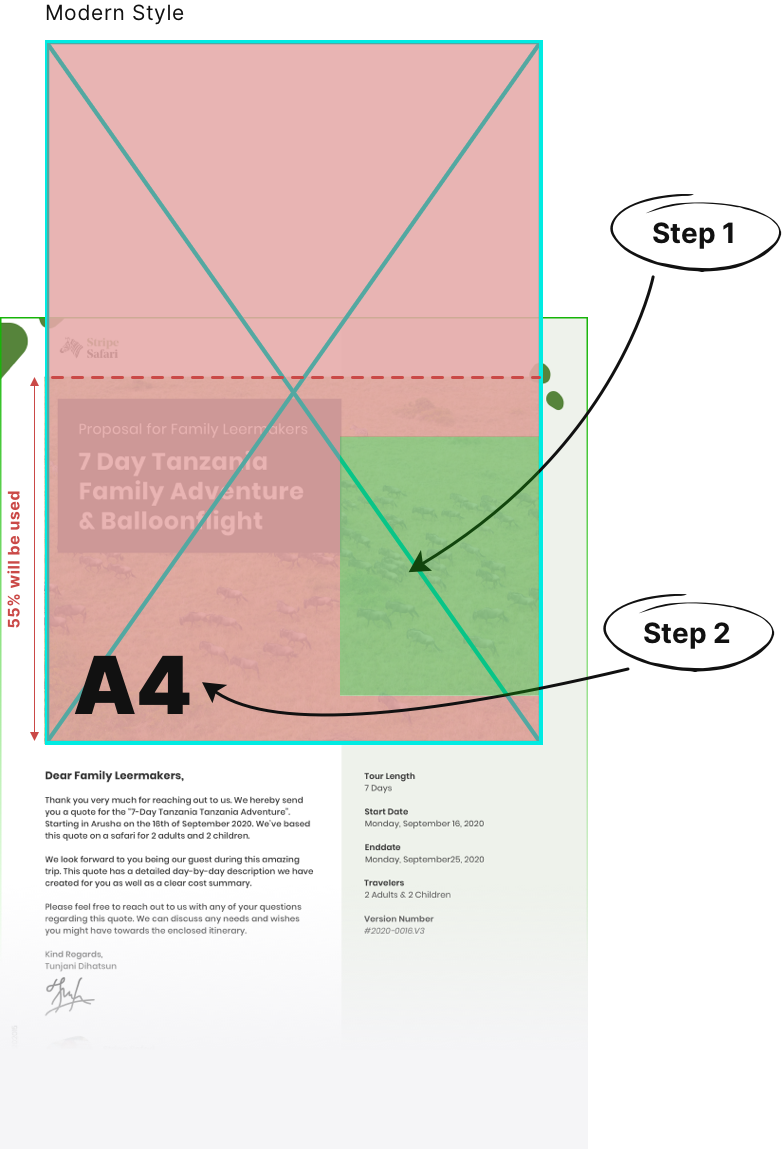
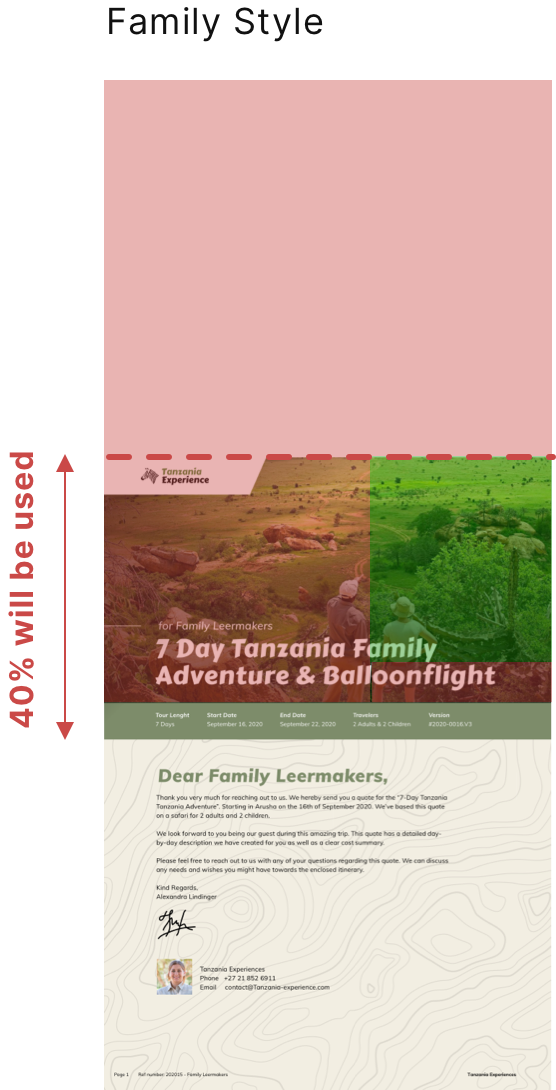
SafariOffice uses an A4 format for the cover and cover letter of your itineraries. When you want to create your own cover letter image then keep in mind the position of the subject and this A4 format.
The green areas in the visuals below will show the place where the main focus of a cover image should be. The red area is the full image you should upload. You can also see which part will be shown on the cover.

Step 1. Position the subject correctly | Step 2. Upload an A4 image | |
You need to choose (or create) an image where the subject (like an animal or vehicle) is positioned in the green area as shown below. If the subject is in the red area, there might be a change the subject will not be visible on the cover due to the way it is positioned in that Style or due to the placement of a title. |
| Use the dimensions of |

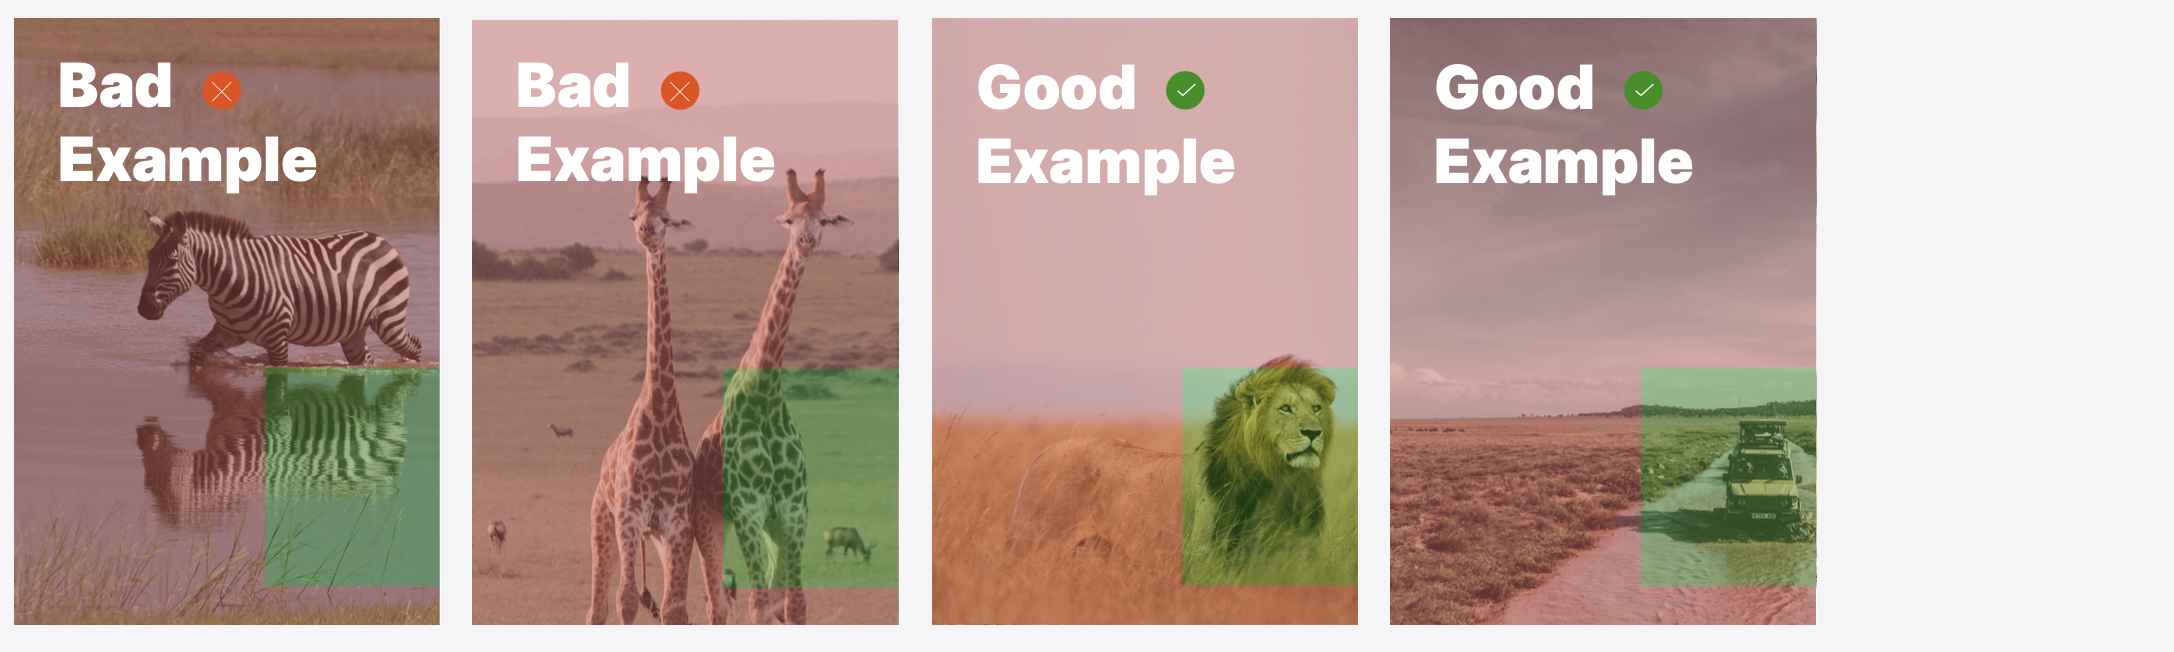
Here are some examples of what we think are bad and good images for covers.
Of course it is up to you to decide what you think works best.
Find the right images. Using the above guidelines make sure you find the right image first, as not any image will work well. If you don't want to edit every single images this is the most important thing to understand. You can also use image platforms like these which offer some free images; Unsplash.com / Pexels.com/ Pixabay.com
Avoid uploading images that are not the correct size format (not A4). SafariOffice will try and scale these so they at least fill the needed space for the A4. This can result in parts of your image being cut off when uploading a landscape image for example or the image be blown up in size. It will also likely not position your subject in the right spot (the green area).
The green area is the main focus but a larger part of the bottom of your image can be visible too. Decide for yourself what you find acceptable. Make sure a client can still understand the image and keep in mind some tour titles might be larger than others.
Crop your landscape image before uploading to the right size. You might only need to cut out (crop) the right size from a landscape image you like. This is easy to do with most image editing tools on a PC or Mac. Keep the placement of the subject in mind though.
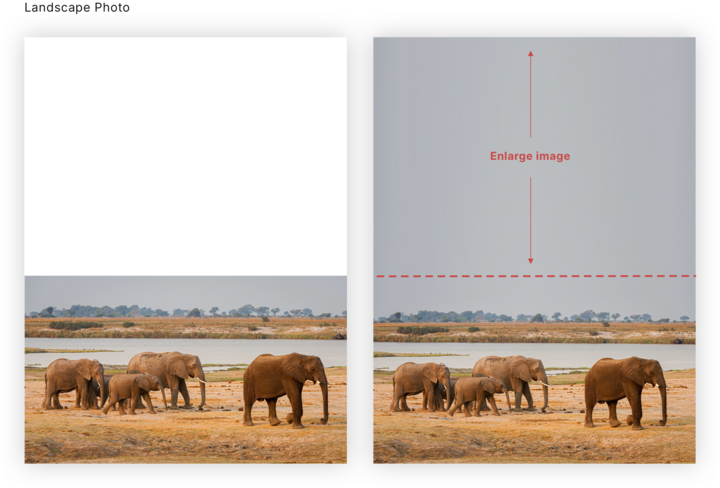
Add space to the top of your image. This is more advanced photo editing. If you use the Modern or Family style you might have a landscape image which could work if it would be the bottom part of an A4 portrait. You could make this work by adding space above the image (which wont be visible in these two styles anyway in the PDF). Do make sure the space has some complementing colour to the image (not white!) so it will work on a mobile itinerary where it is used as a portrait. Below an example.
The digital itinerary will also use the cover as the starting image and will use the lower 50% for all styles (This is approximately as this is a responsive website and can be shown in different size on different devices.)

Download this free Photoshop file we created as an example to use.
Feel free to reach out for help if you need more information on this subject!
