Setting up the pricing for your safari quote is a streamlined process, allowing you to manage everything from alternative accommodation rates to optional extras in one place.
To begin, open the quote in question and navigate to Step 2: Pricing. Here, you will find the main table where you can manage the financial details of the trip:
Select your currency : Above the table, you can select the currency you would like to use for the quote.
To add more currencies you can do so via your system settings under ‘currencies’.
Set Traveler Rates: The traveler type and number are automatically pulled from your request information.
You can enter the total package price for each traveler and the software will tally the total for you.

Detailing the costs: Alternatively you can add as many line items to the table as you desire. This is great for splitting the costs of the tour up.
For example you can have line items for meal plans, accommodations or even activities.
Please ensure that you add a mark up per line item as everything placed in this table will be present in the final pricing page of the quote, unless you choose to hide it.
Apply Discounts: If you need to deduct an amount — as an example for a seasonal discount —simply enter the value with a negative sign in front of it.

To include accommodation alternatives and optional extras in your itinerary and pricing page you will need to add them in Step 1: Day by Day.
How to Add Alternative Accommodations
Learn about how to add alternative accommodations to your itineraries.
Once that has been done the system will create a table for these alternative accommodations in Step 2: Pricing. The table may appear different if you chose either single or package alternatives.
Each accommodation option you add as a single alternative for one or several of the nights of the tour will need to be priced separately.
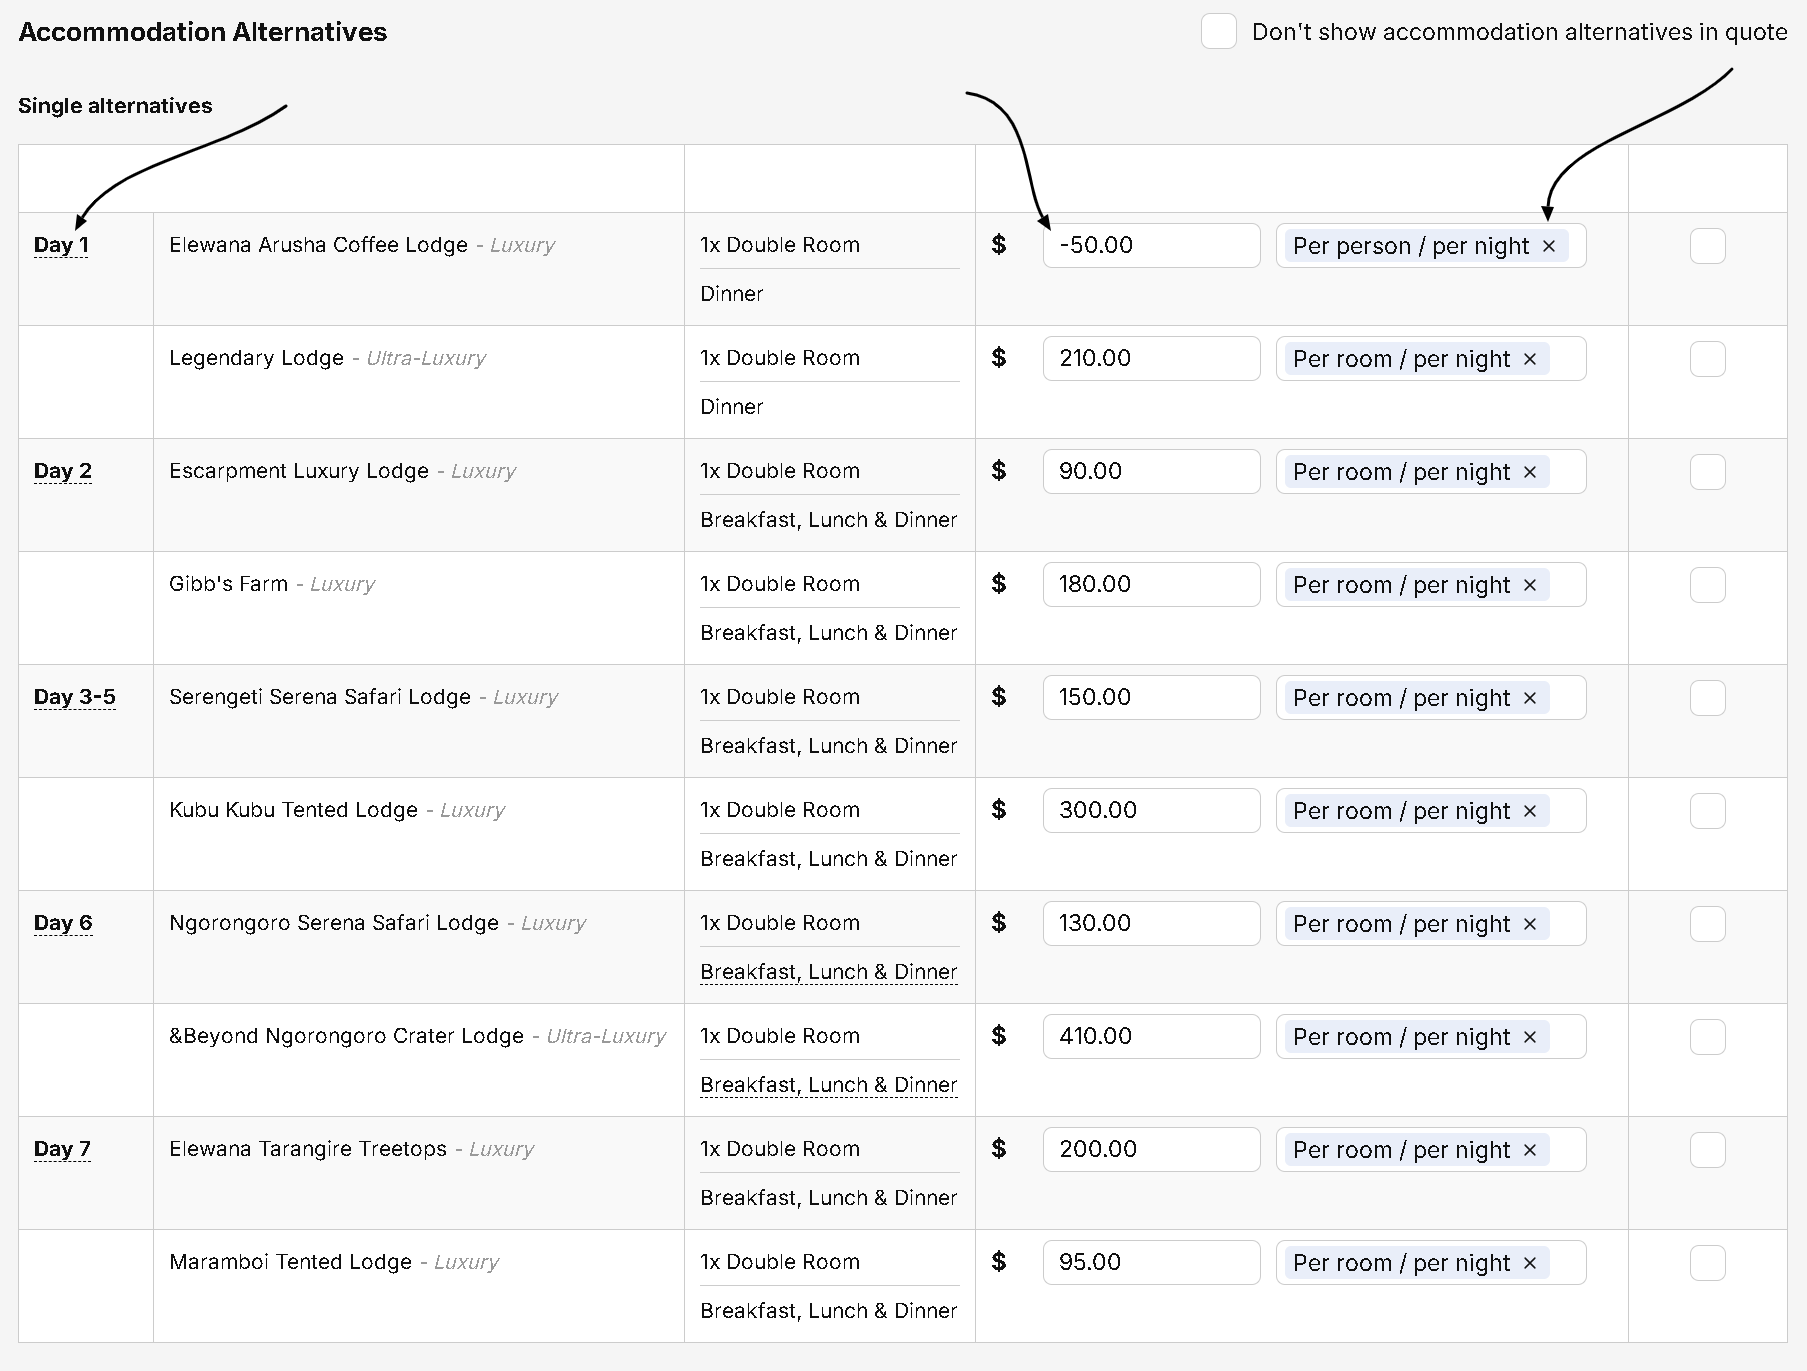
At the top left of the table you can hover over the label ‘Day x’ to see the default accommodation for that day.
In the field for the price, put in the difference in price between the default accommodation and the single alternative accommodation.
If the single alternative is cheaper stipulate this price with a negative sign (-) Infront of it. If the single alternative is more expensive simply enter the value of the price difference.
On the right of the price you can enter a quantifier for the price. For example you can enter text such as ‘Per room’, ‘per person sharing’, ‘per solo traveler’ etc. This serves the purpose of helping your client calculate the difference in cost if they choose this accommodation.
The right most column of the table has a check box which you can select if you want to hide any of the single alternative options in the final quote.
With the package alternatives you can price the entire package as a lump sum.
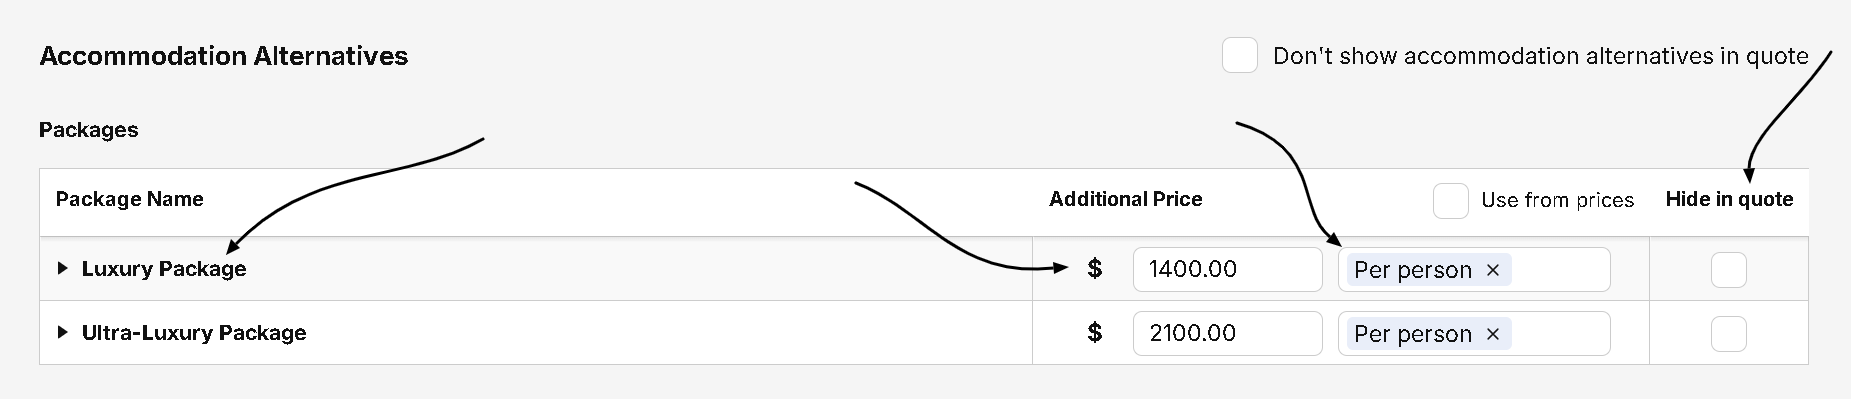
You can expand the package by clicking on the label you gave it. This will show you all of the accommodations that comprises the package.
In the field for the price, put in the difference in price between the package and the default accommodations of the tour. This is usually stipulated as a lump sum.
If the single package is cheaper than the default accommodations - stipulate this price with a negative sign (-) Infront of it.
If the single package is more expensive/an upgrade simply enter the value of the price difference.
On the right of the price you can enter a quantifier for the price. For example you can enter text such as ‘Per person sharing’, ‘per solo traveler’ etc. This serves the purpose of helping your client calculate the difference in cost for their entire party if they choose this package.
The right most column of the table has a check box which you can select if you want to hide any of the package options in the final quote.
Activities set as "optional" in Step 1 (such as horseback riding or balloon safaris etc.) can be priced separately from the main pricing table.
#6 How to Add (Optional) Activities
A demonstration of how to add optional activities to step one of the quote creation process
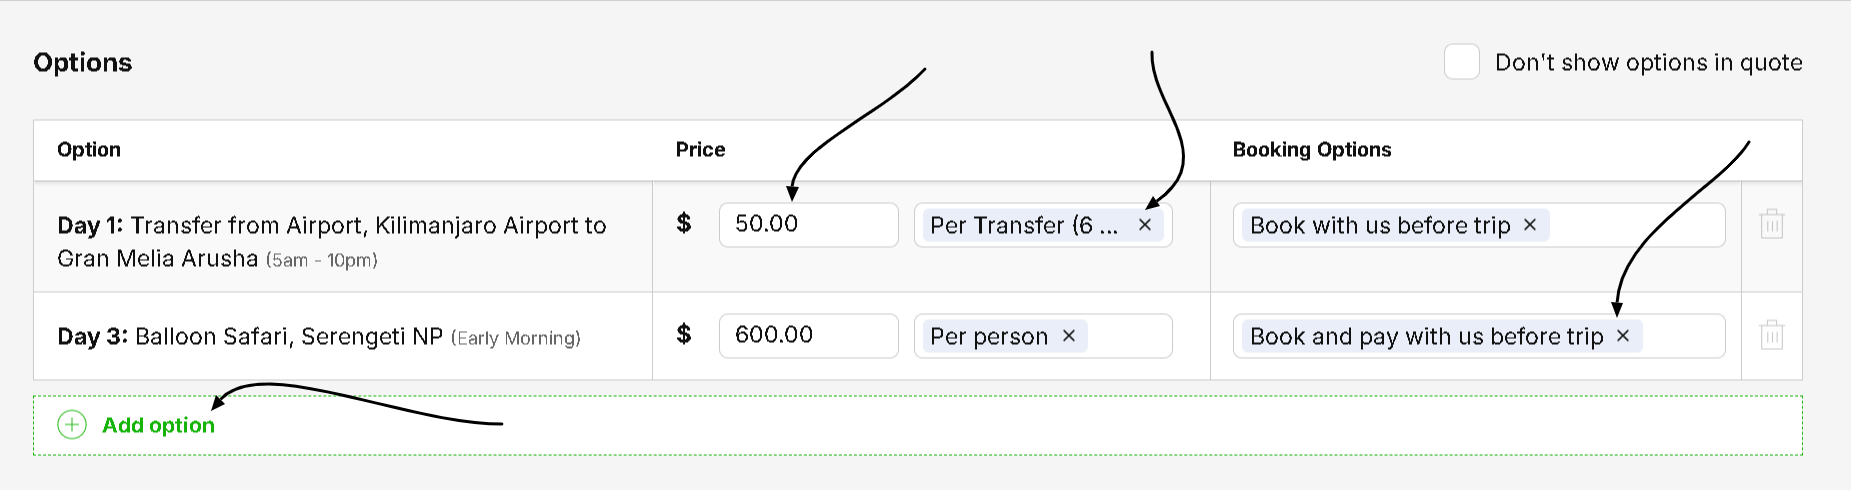
When adding the additional cost value you can mention whether it is per person, per transfer it total etc.
You can also set specific booking terms for these, indicating if they can be booked before or during the trip under the ‘booking options’ column.
If an optional activity is free/suggested you can stipulate it as having no cost. The same is true for activities that may occur at the same time and the traveler is required to select the one they prefer (perhaps also at not additional cost).
For items/activities that apply to the entire journey rather than a specific day—like hiring equipment or an alcohol package —you can add them directly in Step 2 by simply clicking the ‘+ Add Option’ button at the bottom of the table.
The bottom of the pricing section handles the "fine print" :
Standardized Sections: this comprises your Inclusions and Exclusions, Payment Terms, and Terms and Conditions. To save time, these can be pre-filled in your settings and mass-applied to all templates and quotes.
Customizing the View: If you want to hide a specific subsection from the client, simply click the "don't show in quote" checkbox above most of the subsections.
Once you reach Step 3: Preview and Edit, you can see how the pricing page appears to your client. It is typically positioned toward the end of the document.
Once you’ve sent the quote to the client they will see a Booking Confirmation button. When they click it, a booking form opens in a new tab where they can select their preferred accommodations, choose optional extras (all set up in both step 1 and 2), and leave you a message.
