Managing your request inbox effectively is crucial for maintaining an organized overview of your tours, especially those that have been booked and completed. Using the 'Completed' status in your request inbox helps keep everything orderly by showing which tours are done.
You can also automate this process, which is great for keeping track of your current and past tours without much effort, letting you focus more on providing great tour experiences.
How to Manually Move Tour Requests to Completed
Once a tour is booked, you can manually mark it as 'Completed' in the 'Booked' inbox. This action moves the request from the 'Booked' category to 'Completed,' signaling that the tour has been successfully executed and all necessary post-tour activities have been concluded.
Click on your Requests tab
Go to the 'Booked' inbox
Hover or click on a specific request
Click on the 'Completed' button for that tour request

How to Automate Moving Tour Requests to Completed
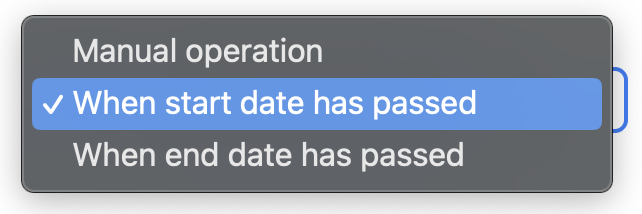
You can make things easier by setting the system to update the status of bookings automatically, based on when the tour starts or ends. This automation helps keep your 'Booked' inbox clean without you having to update it every day.
Settings > Request Settings > Statuses
Go to your account Settings
Click on 'Statuses'
Select your preferred method: based on the start date or end date