
Managing your request inbox effectively is key to maintaining a streamlined and organized overview of your tours.
What is the Pre-Booked Status?
The Pre-Booked status is an optional organizational tool that allows you to categorize bookings that are confirmed by the client but not yet finalized in your system.
Automatic Transition: If a client confirms a booking via your online form, it will automatically appear under the Pre-Booked status.
Manual Update: You can manually set any tour request to Pre-Booked from your Opened inbox.
Using the Pre-Booked status helps:
Track booking progress more clearly.
Avoid confusion between requests and confirmed bookings.
Stay organized before moving to final confirmation.
How to Activate the Pre-Booked Status
In the dropdown menu next to Pre-Booked status, select YES.
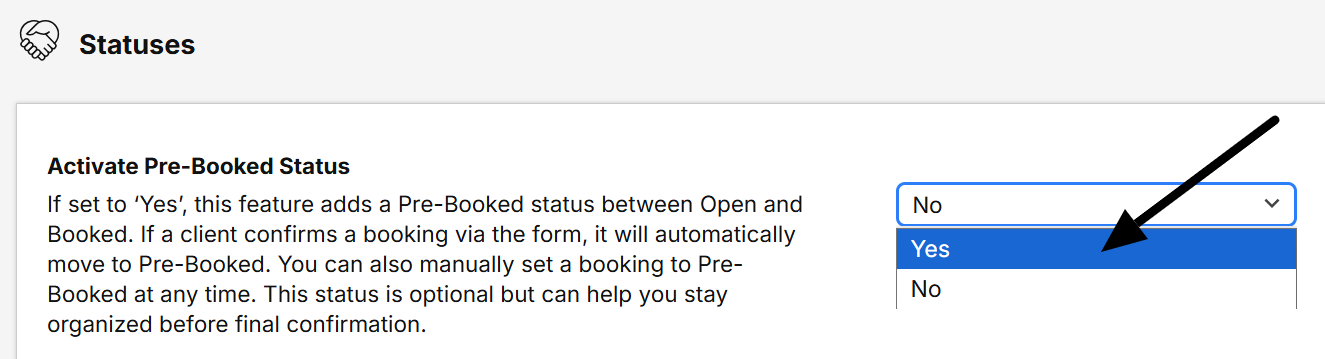
Once activated, a Pre-Booked tab will appear under your Request tab section.
How to Use Pre-Booked
In your Open inbox, find the quote you wish to mark as Pre-Booked.
Click on it and manually change its status to Pre-Booked.
The request will move to the new Pre-Booked sub-tab, keeping your Open inbox clean.
By enabling this status, you're creating a smoother pipeline from inquiry to finalized tour.